How To Create Twenty Twenty Child Theme

If you want to modify a theme which have regularly updated than you need to make create child theme. With child theme you can make change small modification and preserve the original theme design and functionality and still get update from the parent theme. Because the original newest theme from wordpress is twenty twenty theme , So in this tutorial i will show how create twenty twenty child theme.

To make twenty-twenty child theme you must make folder twentytwenty-child in wp-content/themes/ and create style.css and functions.php
So the structure is like this :

  • wp-content/themes/twentytwenty-child
  • wp-content/themes/twentytwenty-child/style.css
  • wp-content/themes/twentytwenty-child/functions.php
  • wp-content/themes/twentytwenty-child/screenshot.png (optional file , with size 1200×900)

Create twentytwenty-child folder

First you must go to directory /wp-content/themes/ than create a folder twentytwenty-child . This folder contain all modification for child theme. Make sure that folder has folder twentytwenty as parent theme so the child theme can work.

Create style.css

In folder twentytwenty-child create file style.css which has contain like this :

/*
Theme Name: Twenty Twenty Child
Theme URL: http://wpamanuke.com/
Description: Twenty Twenty Child Theme
Author: WPAmaNuke
Author URL: http://wpamanuke.com/
Template: twentytwenty
Version: 1.0.0
Text Domain: twentytwenty-child
*/ 
/* Custom CSS goes after this line */

h2.entry-title {
	background-color:#ff0000;
}
h1.entry-title {
	background-color:#ff0000;	
}

Note :

  • Theme Name : Your child theme name , it must be unique
  • Template : Your parent theme directory. Parent theme folder is twentytwenty
  • Text Domain : is to make theme translatable using po/mo files

Create functions.php

In folder twentytwenty-child create file functions.php which has contain like this to include style.css from parent theme :

<?php

	add_action( 'wp_enqueue_scripts', 'tt_child_enqueue_parent_styles' );

	function tt_child_enqueue_parent_styles() {
	   wp_enqueue_style( 'parent-style', get_template_directory_uri().'/style.css' );
	}

?>

That’s all the basic knowledge to modify / update Twenty Twenty child theme. It’s still basic but you can extend the functions and style. This child theme only change the title post background become red. After that to activate the theme from wp-admin in the Appearance -> Themes
Mini CrossWord Android Brain Games You Must Have

Have you ever played crosswords ? Crosswords is brain games using puzzle box. Ussualy it appear in magazine or newspaper. But today , many android game who have cross words. Here are some crosswords games which i think you must have

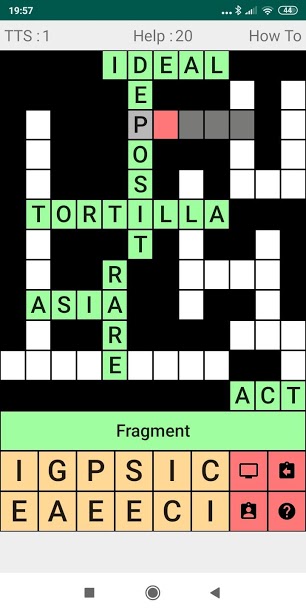
Mini Crossword Puzzle English

Mini Crossword is crossword to train your English vocabulary. This free crossword work offline , so you don’t need internet connection. Highly recommend for anyone wanting a brain teaser for the train commute or in waiting time. Just click this , if you want to download mini crossword puzzle

Crossword English Chinese Vocabulary

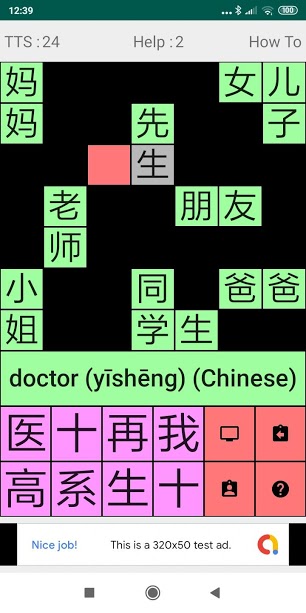
Do you want to train English Chinese vocabulary ? This crossword is perfect for you. It contain pingyin, Chinese character and English vocabulary . It contain HSK 1 , HSK 2 until HSK 6. So you can learn almost all characters. nglish is most popular language in the world , and Chinese is 2nd most popular language. If you can speak Chinese and English , you can communicate with 2.5 billion people in the world. With this app, you can learn English Chinese vocabulary step by step and improving your language skills. You can download English Chinese Crossword Free

TTS Asah Otak Indonesia

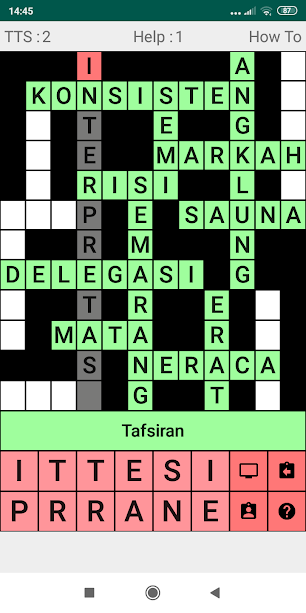
Do you want to train your knowledge in Indonesian language. TTS or Teka Teki Silang is the answer. TTS Asah Otak is crossword suitable for that. With more than 100 levels. It’s very fun to play this game. The design is easy and nice. And it has help , so you always know the answers.

How To Make Custom Send Email Form WordPress Plugin

Beside using already form plugin which have been developed freely. Sometimes we need to make custom send email form to send result from calculator or any processing form. Here is tutorial to make simple custom form email

Here are some WordPress function which will be used : wp_register_script , wp_register_style , wp_enqueue_script , wp_localize_script , wp_enqueue_style, add_shortcode and wp_mail

Here is zz-custom-email.php contains

<?php

/*
Plugin Name: ZZ Custom Email
Plugin URI: http://wpamanuke.com
Description: Custom Email. Use short code [zz-custom-email] to use this email form. 
Author: WPAMANUKE
Version: 1.0
Author URI: wpamanuke.com
*/
define( 'ZZCE_VERSION', '1.0');
define( 'ZZCE_URL', plugin_dir_url( __FILE__ ));

// First we register our resources using the init hook
function ZZCE_resources() {
	wp_register_script("ZZCE-script", plugins_url("js/main.js", __FILE__), array('jquery'), ZZCE_VERSION, false);
	wp_register_style("ZZCE-style",  plugins_url("css/style.css", __FILE__) , array(), ZZCE_VERSION, "all");
}
add_action( 'init', 'ZZCE_resources' );

function ZZCE_func( $attr , $content) {
	wp_enqueue_script('jquery');
	wp_enqueue_script( 'ZZCE-script',array('jquery') , ZZCE_VERSION, true);
	$nonce = wp_create_nonce( 'ZZCE_nonce' );
	wp_localize_script( 'ZZCE-script', 'ZZCE_var', array( 'ajax_url' => admin_url( 'admin-ajax.php' ) , 'nonce' => $nonce ) );
	wp_enqueue_style("ZZCE-style");
	ob_start();
	include plugin_dir_path( __FILE__ ) . "/template.php";
	$myvar = ob_get_clean();
	
	return $myvar;
}

add_shortcode('zz-custom-email', 'ZZCE_func');

// sendemail AJAX
add_action( 'wp_ajax_ZZCE_sendmail', 'ZZCE_sendmail' );
add_action( 'wp_ajax_nopriv_ZZCE_sendmail', 'ZZCE_sendmail' );
function ZZCE_sendmail() {
	check_ajax_referer( 'ZZCE_nonce' , '_ajax_nonce' );
	
	//SEND EMAIL TO USER
		$email_user = sanitize_email($_POST["email_user"]);
		$title_user = sanitize_text_field($_POST["title_user"]);
		$message_user = sanitize_text_field($_POST["message_user"]);
		
		add_filter('wp_mail_content_type', function( $content_type ) {
            return 'text/html';
		});
		$to = get_option('admin_email');
		$subject = 'ZZ Custom Email : ' . $title_user;
		$body = '<html>
			<body>
				<table>
					<tr>
						<td>From</td> <td>'. $email_user .'</td>
					</tr>
					<tr>
						<td>Message</td> <td>'. $message_user .'</td>
					</tr>
					
				</table>
			</body>
		</html>';
		$headers = array('Content-Type: text/html; charset=UTF-8');
		
		if (($email_user)&&($title_user)&&($message_user)) {
			$success_user = wp_mail( $to, $subject, $body, '', array( '' ) );
			if ($success_user) {
				echo '<div class="zz-success">Your message has been succesfully sent to admin</div>';
			} else {
				echo '<div class="zz-failed">Your message failed to be sent to admin. Please try again</div>';
			}
		} 
		$aStr = "";
		if (!$email_user) {
			$aStr = '<div class="zz-failed">You must fill your email first</div>';
		}
		if (!$title_user) {
			$aStr = $aStr . '<div class="zz-failed">You must fill your subject first</div>';
		}
		if (!$message_user) {
			$aStr = $aStr . '<div class="zz-failed">You must fill your message first</div>';
		}
		if ($aStr) {
			echo $aStr;
		}
		wp_die();
}
	

?>

template.php

<div class="zz-custom-email">
	<div class="zz-flex">
		<div class="zz-label">
			<label>Your Email Address</label>
		</div>
		<div class="zz-field">
			<input type="text" id="email-user" /> 
		</div>
	</div>
	<div class="zz-flex">
		<div class="zz-label">
			<label>Subject</label>
		</div>
		<div class="zz-field">
			<input type="text" id="title-user" /> 
		</div>
	</div>
	<div class="zz-flex">
		<div class="zz-label">
			<label>Your Message</label>
		</div>
		<div class="zz-field">
			<textarea id="message-user"></textarea>
		</div>
	</div>
	<div class="zz-flex">
		<div class="zz-center">
			<input type="button" id="zz-submit-email" value="SEND RESULT" /> 
		</div>
	</div>
	
	<div id="zz-email-result">
	</div>
</div>

main.js

jQuery(function($){
	
	
	// SEND Email
	$('#zz-submit-email').on('click',function(){
		
		var aData = {
			'_ajax_nonce': ZZCE_var.nonce,
			'action': 'ZZCE_sendmail',
			'email_user': $("#email-user").val(),
			'title_user': $("#title-user").val(),			
			'message_user':$("#message-user").val()
		};
	
		jQuery.ajax({
           url: ZZCE_var.ajax_url,
           type: "POST",
           cache: false,
           data: aData,
		   beforeSend: function() {
			   $("#zz-email-result").html('<div class="zz-process">Processing Sending Email</div>');
		   },
           success:function(response){
			   
			   $("#zz-email-result").html(response);
			}
        }); 
	});
});

style.css

.zz-flex {
	display:flex;
	margin-bottom:10px;
}
.zz-label {
	width:150px;
}
.zz-field {
	width:100%;
}
.zz-failed {
	margin-bottom:10px;
	background-color:#ff0000;
	color:#ffffff;
	padding:5px;
}
.zz-success {
	margin-bottom:10px;
	background-color:#00ff00;
	color:#ffffff;
	padding:5px;
}

That’s all functions , html , javascript and css which are needed. It’s still very simple. But you can developed it further if you have any calculation / other form , just need some modification. Ussualy it’s needed to send pdf file which is generated based on form input. But because it’s too long so i just explain about the sending email using ajax only.

How To Create Related Post WordPress Plugin

Some weeks ago i need to create releated post for single.php . After some tries and looking idea in the internet . Here is the plugin idea : find related post based on categories where related post based on post date before the post single which become the center

To do that we need function : is_single , wp_get_post_categories , get_posts , and add_filter for the_content to put related post under content.

Some Notes : to get post ID on single just use global $post , get_posts is used get post based on criterias, wp_get_post_categories to get categories of existing post

Because we need to convert post date we need function strtotime and date in Y-m-d format . Ok here is the full code :

<?php
/*
Plugin Name: ZZ Related Post
Plugin URI: http://www.wpamanuke.com
Description: Sample Related Post based on category
Version: 1.0.1po
Author: WPAmaNuke
Author URI: https://wpamanuke.com
*/

// ADD BOTTOM RELATED ARTICLE ON THE POST SINGLE
function zz_related_post() {
   // check if single
   if (is_single()) {
		global $post;
		
		$post_ids = [];
		$prev_post = get_previous_post();
		$next_post = get_next_post();
		$i = 0;
		$post_ids[$i] = $post->ID;
		$i++;
		if ($prev_post) {
			$post_ids[$i] = $prev_post->ID;
			$i++;
		}
		/*
		if ($next_post) {
			$post_ids[$i] = $next_post->ID;
		}
		*/
		
		$a = strtotime($post->post_date . " 0 month");
		$time = date("Y-m-d",$a);
		$cat = wp_get_post_categories($post->ID);
		
		
		$related = get_posts( 
			array( 
				'category__in' => $cat, 
				'numberposts' => 3, 
				'post__not_in' => $post_ids,
				//'meta_key'=>'_thumbnail_id',
				'orderby' => 'DATE',
				'order' => 'DESC',
				'date_query' => array(
					'before' => $time 
				)
			) 
		);
		
		
		if ($related) {
			echo '<div class="zz-related-post">';
			echo '<h3>Related Post</h3>';
			
			foreach( $related as $post ) {
				setup_postdata($post);
				?>
				<div class="zz-related-post_block">
				<article>
					<?php if ( has_post_thumbnail() ) { ?>
						<figure class="zz-related-post_image"> 
							<a class="zz-image-link" href="<?php the_permalink(); ?>" title="">
								<?php the_post_thumbnail( 'medium' ); ?>
							</a>
						</figure>
					<?php } ?>
					<div class="zz-related-post_title">
						<h4 class="zz-meta-title"><a href="<?php the_permalink(); ?>" title=""><?php the_title(); ?></a></h4>
					</div>
				</article>    
				</div>
				<?php
			}
			echo '</div>';
			
		}
		wp_reset_postdata();
   }
}
// End Function Related POST

function zz_after_content($content) {
	ob_start();
	zz_related_post();
	$after_content = ob_get_clean();
	$custom_content = $content . $after_content;
	return $custom_content;
}
add_filter( 'the_content', 'zz_after_content');


?>

Just see your single post . And Related post will be on the bottom after content.

How To Include Javascript and CSS on Shortcode WordPress Plugin

Some weeks ago i try to find to include javascript and css on a shortcode only when the file is needed. After some search on the internet here is which i think the most efficient way.

First we must register file resource which we need, so we can call in the shortcode using wp_register_script and wp_register_style

// First register resources with init 
function zz_shortcode_resource() {
	wp_register_script("zz-shortcode-jscss-script", plugins_url("script.js", __FILE__), array('jquery'), "1.0", false);
	wp_register_style("zz-shortcode-jscss-style", plugins_url("style.css", __FILE__), array(), "1.0", "all");
}
add_action( 'init', 'zz_shortcode_resource' );

After that we call our shortcode function with wp_enqueue_script and wp_enqueue_style

add_shortcode( 'zz_shortcode_jscss', 'zz_shortcode_jscss' );
function zz_shortcode_jscss( $attr , $content) {
	$a = shortcode_atts( array(
	  'text' => ''
	), $attr );
	wp_enqueue_script( 'jquery' );
	wp_enqueue_script("zz-shortcode-jscss-script",array('jquery') , '1.0', true);
	wp_enqueue_style("zz-shortcode-jscss-style");
	return '<div class="zz-sc-jscss">' . $a['text'] .'</div>';
}

Here is the complete source code in plugin so you can use it :

<?php
/*
Plugin Name: ZZ Shortcode With JS and CSS
Plugin URI: http://www.wpamanuke.com
Description: Include Javascript File and CSS Files on the Shortcode . Example [zz_shortcode_jscss text="HELLO CODE"][/zz_shortcode_jscss]
Version: 1.0.1
Author: WPAmaNuke
Author URI: https://wpamanuke.com
*/

// First register resources with init 
function zz_shortcode_resource() {
	wp_register_script("zz-shortcode-jscss-script", plugins_url("script.js", __FILE__), array('jquery'), "1.0", false);
	wp_register_style("zz-shortcode-jscss-style", plugins_url("style.css", __FILE__), array(), "1.0", "all");
}
add_action( 'init', 'zz_shortcode_resource' );

add_shortcode( 'zz_shortcode_jscss', 'zz_shortcode_jscss' );
function zz_shortcode_jscss( $attr , $content) {
	$a = shortcode_atts( array(
	  'text' => ''
	), $attr );
	wp_enqueue_script( 'jquery' );
	wp_enqueue_script("zz-shortcode-jscss-script",array('jquery') , '1.0', true);
	wp_enqueue_style("zz-shortcode-jscss-style");
	return '<div class="zz-sc-jscss">' . $a['text'] .'</div>';
}

Here is the style.css . Because it’s only sample , so we need only little css to show that it is working

.zz-sc-jscss {
	padding:30px;
	background-color:#ff0000;
	color:#ffffff;
}

For javascript script.js . Just showing alert for simple showing the code working

jQuery( document ).ready(function($) {
	alert('This is from shortcode with js and css');
});

Ok. That’s how to include javascript and css on shortcode. I just record it , so if sometime i will need it , i just see this blog records

How To Create Dashboard Widget WordPress Plugin

Dashboard widget is widget which is shown in the administration dashboard.

Code which ussualy used :

  • wp_add_dashboard_widget
  • add_action , wp_dashboard_setup

The minimalist code which can be used :

/**
 * Add a widget to the dashboard.
 *
 * This function is hooked into the 'wp_dashboard_setup' action below.
 */
function zz_add_dashboard_widgets() {

	wp_add_dashboard_widget(
                 'zz_dashboard_widget',         // Widget slug.
                 'ZZ Dashboard Widget',         // Title.
                 'zz_dashboard_widget_function' // Display function.
        );	
}
add_action( 'wp_dashboard_setup', 'zz_add_dashboard_widgets' );

/**
 * Create the function to output the contents of our Dashboard Widget.
 */
function zz_dashboard_widget_function() {

	// Display whatever it is you want to show.
	echo "<h2>RSS Feed</h2>";
	output_rss_feed('http://wpamanuke.com/?feed=rss', 5, true, true, 200);
}

Complete Code

<?php
/*
Plugin Name: ZZ Dashboard Widgets
Plugin URI: http://www.wpamanuke.com
Description: Sample Dashboard Widgets Code
Version: 1.0.1
Author: WPAmaNuke
Author URI: https://wpamanuke.com
*/

/**
 * Add a widget to the dashboard.
 *
 * This function is hooked into the 'wp_dashboard_setup' action below.
 */
function zz_add_dashboard_widgets() {

	wp_add_dashboard_widget(
                 'zz_dashboard_widget',         // Widget slug.
                 'ZZ Dashboard Widget',         // Title.
                 'zz_dashboard_widget_function' // Display function.
        );	
}
add_action( 'wp_dashboard_setup', 'zz_add_dashboard_widgets' );

/**
 * Create the function to output the contents of our Dashboard Widget.
 */
function zz_dashboard_widget_function() {

	// Display whatever it is you want to show.
	echo "<h2>RSS Feed</h2>";
	output_rss_feed('http://wpamanuke.com/?feed=rss', 5, true, true, 200);
}

function get_rss_feed_as_html($feed_url, $max_item_cnt = 10, $show_date = true, $show_description = true, $max_words = 0)
{
    $result = "";
    // get feeds and parse items
    $rss = new DOMDocument();
	$rss->load($feed_url);

    $feed = array();
    foreach ($rss->getElementsByTagName('item') as $node) {
        $item = array (
            'title' => $node->getElementsByTagName('title')->item(0)->nodeValue,
            'desc' => $node->getElementsByTagName('description')->item(0)->nodeValue,
            'content' => $node->getElementsByTagName('description')->item(0)->nodeValue,
            'link' => $node->getElementsByTagName('link')->item(0)->nodeValue,
            'date' => $node->getElementsByTagName('pubDate')->item(0)->nodeValue,
        );
        $content = $node->getElementsByTagName('encoded'); // <content:encoded>
        if ($content->length > 0) {
            $item['content'] = $content->item(0)->nodeValue;
        }
        array_push($feed, $item);
    }
    // real good count
    if ($max_item_cnt > count($feed)) {
        $max_item_cnt = count($feed);
    }
    $result .= '<ul class="feed-lists">';
    for ($x=0;$x<$max_item_cnt;$x++) {
        $title = str_replace(' & ', ' & ', $feed[$x]['title']);
        $link = $feed[$x]['link'];
        $result .= '<li class="feed-item">';
        $result .= '<div class="feed-title"><strong><a href="'.$link.'" title="'.$title.'">'.$title.'</a></strong></div>';
        if ($show_date) {
            $date = date('l F d, Y', strtotime($feed[$x]['date']));
            $result .= '<small class="feed-date"><em>Posted on '.$date.'</em></small>';
        }
        if ($show_description) {
            $description = $feed[$x]['desc'];
            $content = $feed[$x]['content'];
            // find the img
            $has_image = preg_match('/<img.+src=[\'"](?P<src>.+?)[\'"].*>/i', $content, $image);
            // no html tags
            $description = strip_tags(preg_replace('/(<(script|style)\b[^>]*>).*?(<\/\2>)/s', "$1$3", $description), '');
            // whether cut by number of words
            if ($max_words > 0) {
                $arr = explode(' ', $description);
                if ($max_words < count($arr)) {
                    $description = '';
                    $w_cnt = 0;
                    foreach($arr as $w) {
                        $description .= $w . ' ';
                        $w_cnt = $w_cnt + 1;
                        if ($w_cnt == $max_words) {
                            break;
                        }
                    }
                    $description .= " ...";
                }
            }
            // add img if it exists
            if ($has_image == 1) {
                $description = '<img class="feed-item-image" src="' . $image['src'] . '" />' . $description;
            }
            $result .= '<div class="feed-description">' . $description;
            $result .= ' <a href="'.$link.'" title="'.$title.'">Continue Reading »</a>'.'</div>';
        }
        $result .= '</li>';
    }
    $result .= '</ul>';
    return $result;
}
function output_rss_feed($feed_url, $max_item_cnt = 10, $show_date = true, $show_description = true, $max_words = 0)
{
    echo get_rss_feed_as_html($feed_url, $max_item_cnt, $show_date, $show_description, $max_words);
}

How To Create Custom Post Type WordPress Plugin

In WordPress, post and page represent contents for website. Taxonomy are categories for posts. You can create your won custom post type with plugin.

Some codes which we will use :

  • register_post_type
  • register_taxonomy
  • add_filter, single_template, taxonomy_template

Code to create custom post type

function wporg_custom_post_type()
{
    register_post_type('wporg_product',
                       array(
                           'labels'      => array(
                               'name'          => __('Products'),
                               'singular_name' => __('Product'),
                           ),
                           'public'      => true,
                           'has_archive' => true,
                           'rewrite'     => array( 'slug' => 'products' ), // my custom slug
                       )
    );
}
add_action('init', 'wporg_custom_post_type');

Code to create taxonomy

function wporg_register_taxonomy_course()
{
    $labels = [
        'name'              => _x('Courses', 'taxonomy general name'),
		'singular_name'     => _x('Course', 'taxonomy singular name'),
		'search_items'      => __('Search Courses'),
		'all_items'         => __('All Courses'),
		'parent_item'       => __('Parent Course'),
		'parent_item_colon' => __('Parent Course:'),
		'edit_item'         => __('Edit Course'),
		'update_item'       => __('Update Course'),
		'add_new_item'      => __('Add New Course'),
		'new_item_name'     => __('New Course Name'),
		'menu_name'         => __('Course'),
		];
	$args = [
		'hierarchical'      => true, // make it hierarchical (like categories)
		'labels'            => $labels,
		'show_ui'           => true,
		'show_admin_column' => true,
		'query_var'         => true,
		'rewrite'           => ['slug' => 'course'],
	];
	register_taxonomy('course', ['wporg_product'], $args);
}
add_action('init', 'wporg_register_taxonomy_course');

if you want to use template in plugin folder :

add_filter('single_template','your_single_template_function');
add_filter( 'taxonomy_template','your_taxonomy_template_function');

Here is the full code and don’t forget to change permalink after you activate the plugin, otherwise it will show 404 page :

<?php
/*
Plugin Name: ZZ Custom Post
Plugin URI: http://www.wpamanuke.com
Description: Sample Custom Post
Version: 1.0.1
Author: WPAmaNuke
Author URI: https://wpamanuke.com
*/

define( 'ZZ_PRODUCT_DIR' , plugin_dir_path( __FILE__ ) );
function wporg_custom_post_type()
{
    register_post_type('wporg_product',
                       array(
                           'labels'      => array(
                               'name'          => __('Products'),
                               'singular_name' => __('Product'),
                           ),
                           'public'      => true,
                           'has_archive' => true,
                           'rewrite'     => array( 'slug' => 'products' ), // my custom slug
                       )
    );
}
add_action('init', 'wporg_custom_post_type');


/* Filter the single_template with our custom function*/
add_filter('single_template', 'my_custom_template');


function my_custom_template($single) {

    global $post;

    /* Checks for single template by post type */
    if ( $post->post_type == 'wporg_product' ) {
        if ( file_exists( ZZ_PRODUCT_DIR . '/single.php' ) ) {
            return ZZ_PRODUCT_DIR . '/single.php';
        }
    }

    return $single;

}


function wporg_register_taxonomy_course()
{
    $labels = [
        'name'              => _x('Courses', 'taxonomy general name'),
		'singular_name'     => _x('Course', 'taxonomy singular name'),
		'search_items'      => __('Search Courses'),
		'all_items'         => __('All Courses'),
		'parent_item'       => __('Parent Course'),
		'parent_item_colon' => __('Parent Course:'),
		'edit_item'         => __('Edit Course'),
		'update_item'       => __('Update Course'),
		'add_new_item'      => __('Add New Course'),
		'new_item_name'     => __('New Course Name'),
		'menu_name'         => __('Course'),
		];
	$args = [
		'hierarchical'      => true, // make it hierarchical (like categories)
		'labels'            => $labels,
		'show_ui'           => true,
		'show_admin_column' => true,
		'query_var'         => true,
		'rewrite'           => ['slug' => 'course'],
	];
	register_taxonomy('course', ['wporg_product'], $args);
}
add_action('init', 'wporg_register_taxonomy_course');

function my_custom_archive( $template ) {
	 $mytemplate = ZZ_PRODUCT_DIR . '/archive.php';

    if( is_tax( 'course') && is_readable( $mytemplate ) )
        $template =  $mytemplate;

    return $template;
}
add_filter( 'taxonomy_template', 'my_custom_archive');

single.php

<?php
$args = [
    'post_type'      => 'wporg_product',
    'posts_per_page' => 10,
];
$loop = new WP_Query($args);
while ($loop->have_posts()) {
    $loop->the_post();
    ?>
    <div class="entry-content">
        <?php the_title(); ?>
        <?php the_content(); ?>
    </div>
    <?php
}

archive.php

<?php
$args = [
    'post_type'      => 'wporg_product',
    'posts_per_page' => 10,
];
$loop = new WP_Query($args);
while ($loop->have_posts()) {
    $loop->the_post();
    ?>
    <div class="entry-content">
        <a href="<?php the_permalink(); ?>" title=""><?php the_title(); ?></a>
        <?php the_content(); ?>
    </div>
    <?php
}

How To Create WordPress Plugin With Ajax

Ajax is the acronym for Asynchronous JavaScript And XML. It’s very usefull if you want to reload specify information from web server. It purpose to reload part of data on the web , so we don’t need to reload all website

To use ajax in WordPress , you need to know PHP and jQuery. Here is some wordpress api which you need to know to use ajax in wordpress :

  • add_action with wp_enqueue_scripts , wp_ajax_your_variable, wp_ajax_nopriv_your_variable
  • wp_create_nonce
  • wp_localize_script : to create variable which needed in javascript
  • check_ajax_referrer : check if referrer from same server
  • wp_die

Here is zz-ajax.php code :

<?php
/*
Plugin Name: ZZ Ajax
Plugin URI: http://www.wpamanuke.com
Description: Sample Ajax
Version: 1.0.1
Author: WPAmaNuke
Author URI: https://wpamanuke.com
*/

add_action( 'wp_enqueue_scripts', 'zz_ajax_enqueue_scripts' );
function zz_ajax_enqueue_scripts() {
	wp_enqueue_script( 'jquery' );
	wp_enqueue_script( 'zz-ajax-script', plugins_url( '/test-ajax.js', __FILE__ ), array('jquery') , '1.0', true);
		
	$nonce = wp_create_nonce( 'zz_ajax_nonce' );
	wp_localize_script( 'zz-ajax-script', 'zz_ajax_var', array( 'ajax_url' => admin_url( 'admin-ajax.php' ) , 'nonce' => $nonce ) );
	
}

add_action( 'wp_ajax_zz_ajax_action', 'zz_ajax_action' );
add_action( 'wp_ajax_nopriv_zz_ajax_action', 'zz_ajax_action' );
function zz_ajax_action() {
	check_ajax_referer( 'zz_ajax_nonce' , '_ajax_nonce' );
	echo "This is ajax message 1234";
	wp_die(); // this is required to terminate immediately and return a proper response
}

test-ajax.js code

jQuery(document).ready(function($) {
	
	var data = {
		'_ajax_nonce': zz_ajax_var.nonce,
		'action': 'zz_ajax_action'
	};
	
	jQuery.post(zz_ajax_var.ajax_url, data, function(response) {
		alert('Got this from the server: ' + response);
	});
	
});

How To Create ShortCode WordPress Plugin

Shortcode are special code in wordpress to show specific function with easy efforts. Shortcode is begin with [ and end with ]. For example function which we will display amazon product with shortcode [azproduct]. With shortcode you can use function coloring easily, or if you need only specific parameter change, shortcode is perfect for your needs.

To enable shortcode you must register it with function :

add_shortcode( 'your_shortcode_name', 'your_shortcode_function' );
function your_shortcode_function($attr,$content) {
}

Here is sample amazon link shortcode code :

<?php
/*
Plugin Name: ZZ Amazon Product ShortCode
Plugin URI: http://www.wpamanuke.com
Description: Sample ShortCode Code
Version: 1.0.1
Author: WPAmaNuke
Author URI: https://wpamanuke.com
*/

add_shortcode( 'azproduct', 'azproduct_link' );

// The callback function that will replace [azproduct]
function azproduct_link( $attr ) {
	
	$asin = '0385495323';
	if ( isset( $attr['asin'] ) ) {
		$asin = $attr['asin'];
	}
	
	$title= 'Buy Now';
	if ( isset( $attr['title'] ) ) {
		$title = $attr['title'];
	}
	
	return '<a href="http://www.amazon.com/dp/'. $asin .'" > '. $title .' </a > ';
}

add_shortcode( 'azproduct_content', 'azproduct_content' );
function azproduct_content( $attr , $content) {
	$a = shortcode_atts( array(
	  'color' => '',
	  'bgcolor' => ''
	), $attr );
	
	return '<div style="color:'. $a['color'] .';background-color:' . $a['bgcolor'] .';">'. $content . '</div>';
}
You can use shortcode in your editor with code like this : 
[azproduct asin="1476755744" title="Red Notice"]
[azproduct_content color="#ff0000" bgcolor="#cc0cc0"]This is contents[/azproduct_content]

How To Create WordPress Widget Plugin

Widget is small block which perform specific function. Widget ussualy put in the sidebar or footer. You can list widgets which are ready in your wordpress from admin area Appearance ยป Widgets section in your WordPress dashboard.

To program widget here is some codes skeletons which you need to know

function your_register_widgets() {
	register_widget('your_widget_class');
}
add_action('widgets_init', 'your_register_widgets');

class your_widget_class extends WP_Widget {
	function __construct() {
	}
	function widget($args, $instance) {
	}
	function update($new_instance, $old_instance) {
	}
	function form($instance) {
	}
}
<?php
/*
Plugin Name: ZZ Widgets
Plugin URI: http://www.wpamanuke.com
Description: Sample Widgets Code
Version: 1.0.1
Author: WPAmaNuke
Author URI: https://wpamanuke.com
*/

function zz_register_widgets() {
	register_widget('zz_widget');
}
add_action('widgets_init', 'zz_register_widgets');

class zz_widget extends WP_Widget { 
	function __construct() {
		parent::__construct(
			'zz_widget', esc_html_x( 'ZZ Widget' , 'widget name', 'zz-widget' ),
			array(
				'classname' => 'zz-widget',
				'description' => esc_html__( 'ZZ Widget Post ' , 'zz-widget' ),
				'customize_selective_refresh' => true
			)
		);
	}
	function widget($args, $instance) {
		$defaults = array('title' => '', 'category' => 0, 'tags' => '', 'postcount' => 5, 'offset' => 0, 'sticky' => 1);
        $instance = wp_parse_args($instance, $defaults);
		$query_args = array();
		$query_args['ignore_sticky_posts'] = $instance['sticky'];
		if (0 !== $instance['category']) {
			$query_args['cat'] = $instance['category'];
		}
		if (!empty($instance['tags'])) {
			$tag_slugs = explode(',', $instance['tags']);
			$tag_slugs = array_map('trim', $tag_slugs);
			$query_args['tag_slug__in'] = $tag_slugs;
		}
		if (!empty($instance['postcount'])) {
			$query_args['posts_per_page'] = $instance['postcount'];
		}
		if (0 !== $instance['offset']) {
			$query_args['offset'] = $instance['offset'];
		}
	    
		$widget_posts = new WP_Query($query_args);
		echo wp_kses_post( $args['before_widget'] );
			if ($widget_posts->have_posts()) :
				$last = $widget_posts->post_count;
				$i = 0;
				if (!empty($instance['title'])) {
					$title = ! empty( $instance['title'] ) ? $instance['title'] : '';
					$title = apply_filters( 'widget_title', $title, $instance, $this->id_base );
					echo wp_kses_post( $args['before_title'] ) . esc_html( $title ) . wp_kses_post( $args['after_title'] );
				}
				echo '<ul class="zz-widget-block">' . "\n";
					while ($widget_posts->have_posts()) : $widget_posts->the_post();
						 echo "<li>
						<a href='";
						the_permalink();
						echo "'>";
						the_title();  
						echo "</a>
						</li>";
					endwhile;
				echo '</ul>' . "\n";
			endif;
			wp_reset_postdata();
			
		echo wp_kses_post( $args['after_widget'] );
		
    }
	function update($new_instance, $old_instance) {
        $instance = array();
        if (!empty($new_instance['title'])) {
			$instance['title'] = sanitize_text_field($new_instance['title']);
		}
        if (0 !== absint($new_instance['category'])) {
			$instance['category'] = absint($new_instance['category']);
		}
		if (!empty($new_instance['tags'])) {
			$tag_slugs = explode(',', $new_instance['tags']);
			$tag_slugs = array_map('sanitize_title', $tag_slugs);
			$instance['tags'] = implode(', ', $tag_slugs);
		}
		if (0 !== absint($new_instance['postcount'])) {
			if (absint($new_instance['postcount']) > 50) {
				$instance['postcount'] = 50;
			} else {
				$instance['postcount'] = absint($new_instance['postcount']);
			}
		}
		if (0 !== absint($new_instance['offset'])) {
			if (absint($new_instance['offset']) > 50) {
				$instance['offset'] = 50;
			} else {
				$instance['offset'] = absint($new_instance['offset']);
			}
		}
        return $instance;
    }
    function form($instance) {
        $defaults = array('title' => '', 'category' => 0, 'tags' => '', 'postcount' => 5, 'offset' => 0, 'sticky' => 1);
        $instance = wp_parse_args($instance, $defaults); ?>
        <p>
        	<label for="<?php echo esc_attr($this->get_field_id('title')); ?>"><?php esc_html_e('Title:', 'zz-widget'); ?></label>
			<input class="widefat" type="text" value="<?php echo esc_attr($instance['title']); ?>" name="<?php echo esc_attr($this->get_field_name('title')); ?>" id="<?php echo esc_attr($this->get_field_id('title')); ?>" />
        </p>
		<p>
            <label for="<?php echo esc_attr($this->get_field_id('category')); ?>"><?php esc_html_e('Select a Category:', 'zz-widget'); ?></label>
            <select id="<?php echo esc_attr($this->get_field_id('category')); ?>" class="widefat" name="<?php echo esc_attr($this->get_field_name('category')); ?>">
            	<option value="0" <?php selected(0, $instance['category']); ?>><?php esc_html_e('All', 'zz-widget'); ?></option><?php
            		$categories = get_categories();
            		foreach ($categories as $cat) { ?>
            			<option value="<?php echo absint($cat->cat_ID); ?>" <?php selected($cat->cat_ID, $instance['category']); ?>><?php echo esc_html($cat->cat_name) . ' (' . absint($cat->category_count) . ')'; ?></option><?php
            		} ?>
            </select>
            <small><?php esc_html_e('Select a category to display posts from.', 'zz-widget'); ?></small>
		</p>
		<p>
        	<label for="<?php echo esc_attr($this->get_field_id('tags')); ?>"><?php esc_html_e('Filter Posts by Tags (e.g. lifestyle):', 'zz-widget'); ?></label>
			<input class="widefat" type="text" value="<?php echo esc_attr($instance['tags']); ?>" name="<?php echo esc_attr($this->get_field_name('tags')); ?>" id="<?php echo esc_attr($this->get_field_id('tags')); ?>" />
	    </p>
        <p>
        	<label for="<?php echo esc_attr($this->get_field_id('postcount')); ?>"><?php esc_html_e('Post Count (max. 50):', 'zz-widget'); ?></label>
			<input class="widefat" type="text" value="<?php echo absint($instance['postcount']); ?>" name="<?php echo esc_attr($this->get_field_name('postcount')); ?>" id="<?php echo esc_attr($this->get_field_id('postcount')); ?>" />
	    </p>
	    <p>
        	<label for="<?php echo esc_attr($this->get_field_id('offset')); ?>"><?php esc_html_e('Skip Posts (max. 50):', 'zz-widget'); ?></label>
			<input class="widefat" type="text" value="<?php echo absint($instance['offset']); ?>" name="<?php echo esc_attr($this->get_field_name('offset')); ?>" id="<?php echo esc_attr($this->get_field_id('offset')); ?>" />
	    </p><?php
    }
}